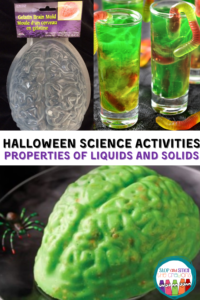
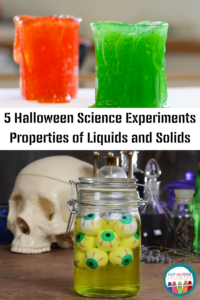
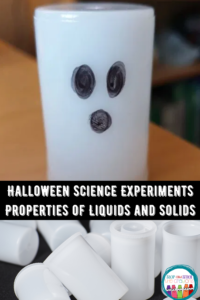
Halloween is right around the corner and rumor has it might be a full moon and what’s a teacher to do when the time of year and the moon’s cycle is not in your favor? Break out some spooky Halloween science activities to captivate your students. Combine STEM experiments and projects and make it STEMulating science!
Science experiments can be a fun way to get your students to focus on the classroom instead of the candy and costumes that come with the season. Here are 5 spooky Halloween science activities that will capture the attention of your little learners.
These experiments can all be found in my Properties of Liquids and Solids unit – and for this blog have been adapted to fit the Halloween theme.
#1 Be a Zombie
One of the best ways to get kids to “buy-in” is to let them know there is going to be food involved. For this experiment you are going to need:
- A brain mold
- You can buy a case of brain-shaped gelatin molds at Dollar Tree for $24.00.
- Jello
- Depending on the type of Jello you purchase, you may need a hot plate
- Water
- Refrigerator
Talk to your students about the STEMulating science behind what is in our food such as how gelatin makes things “gel” together. You can also talk about what heat does to the contents (makes it runny) and what the cold does as well (hardens it). When you put your brains in the fridge, have students take mini monitor breaks where they go and write down the consistency of the Jello as it hardens.
When everything is done and your observations have been made, your students can be zombies and eat some brains!
#2: Bubble, Bubble, Toil and Trouble
Following food up can be tough, but I have a trick up my sleeve: slime. Yes, slime is all the rage with kids these days and while parents and teachers might hate this new fad it’s great for science!
To start, pick your favorite slime recipe or have your students bring their favorite slime recipe and ingredients for a fun compare and contrast. (Slime can be made with Borax, white glue and coloring agents) Once your slime is made, add a little volcano juice (baking soda and vinegar) and let the slime bubble!
Your students can compare and contrast what the baking soda and vinegar does in the different types of slime, plus they can play with food coloring to get it to be just the right color of potion. Add a little extra STEMulation by bringing in their creative side. Have each group name their potion and say what it would do to anyone who consumes.
#3 Vampire’s Lunch
Is it really Halloween if you don’t have a little blood? With the use of chlorophyll and a little bit of black light, turn your greens into a vampire treat! For this experiment you will need:
- Leafy greens like kale, spinach, cilantro, etc.
- Boiling water
- Tongs
- A bowl of ice and water
- Vegetable or canola oil
- Blender
- A mesh strainer
- Blacklight
To start, get the chlorophyll out of your plants by placing them in boiling water for one minute. Then, using the tongs, transfer your chlorophyll-less greens to the ice bath to cool off for a minute before putting them in the blender. Add a touch of oil and blend the leaves into a thin liquid. Next, you will strain the green oil through the mesh strainer. You do not want to get any chunks into this vampire treat! Finally, take your black light and shine it over the green juice. Your vegan vampire treat will turn into a carnivore’s dream.
In this lesson, you can talk to students about how light can change things, how heat can change the appearance and texture of things, and how to feed a vampire. Sounds pretty STEMulating to me.

#4 Decomposition
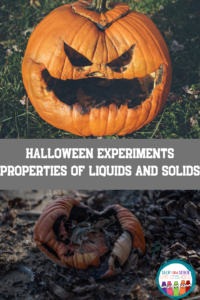
Pumpkin carving is all fun and games until that smile turns into a droopy frown and you have a pile of rotting gourd sitting on your porch. Instead of watching your jack-o-lantern decompose outside, bring the poor guy inside and put him to the test.
For this experiment, you will need several carved pumpkins. How many is several? That’s up to you, but I would say at least 3.
To begin, talk to your class about what decomposition is. Then discuss how decomposition can be quickened or slowed down depending on the environment. Take your three pumpkins and put them in different elements. You can put one under a heat lamp, one in the fridge, and one in the classroom. Have your students go “pumpkin watching” every day in October. During their observation, they should compare and contrast what the pumpkin looks like from one day to the next.
#5 Boo! The Ultimate favorite Halloween Science Activity!
It’s not Halloween if there’s not a ghost around. You can make these awesome flying ghosts with your students and all you will need is:
- A clear film canister or like item
- Corn start
- Water
- A black marker
- Alka seltzer
- Stir stick
To start use that black marker to put a scary face on the ghost (the white film canister). Once the permanent marker has dried, put 1-3 tablespoons of corn starch in the container. Next, fill the container one-third of the way with warm water and stir until combined. This gives the ghost a nice translucent look! Finally, break the Alka seltzer tablet into 3-4 pieces. Put all the pieces into the canister and put the lid back on; flip it over, put it on the ground and stand back! Your ghost is ready to fly!
There are so many ways you can try to make your ghost jump higher. Keep experimenting to find out how!
While Halloween can be a stressful time of year for teachers (everyone is comfortable and the holiday is not in your favor). Try using fun STEMulating Halloween science activities to add some fun with your students this spooky time of year.
If you liked these ideas – click this link for MORE STEM-based Science Activities.
